From your child’s toys to plastic electronics can be produced by injection molding. This process is one of the most prevalent processes in the plastic industry. Basically, this technique is quite simple. It goes through some steps, such as melting the plastic, injecting it into the mold, cooling and separating the mold. However, when actually involved in the production process, there are some cases you need to keep in mind.
From the beginning of plastic injection with heat
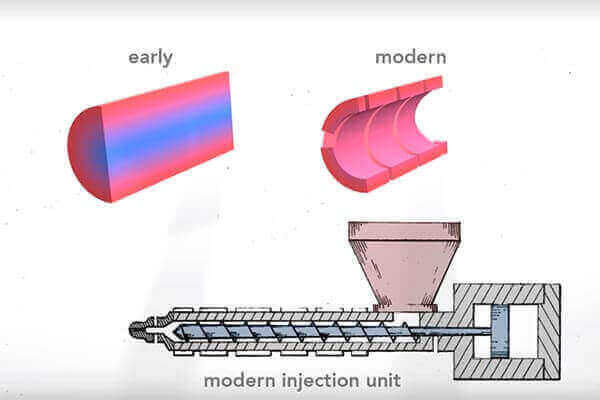
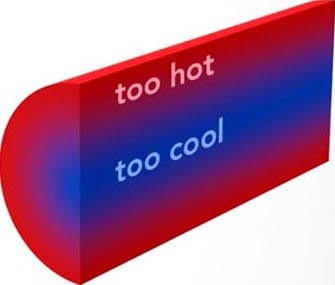
All injection molded objects start with plastic pellets. People can mix them with up to 15% recycled material and small amounts of a pigment, called “colorant”. Then, manufacturers feed them into the injection molding machine. Before the middle of 20th century, this machine used only external heating of the barrel to melt the plastic before a plunger injected the molten material. However, because plastic conducts heat poorly, the temperature was uneven in the plunger. Either the middle was cool and not fully melted, or the outer regions were too hot and degrade the plastic.
Solutions
The solution was this: the reciprocating screw. Often regarded as the “most important contribution that revolutionized the plastic industry in 20th century.” In the earlier plunger-style machine plastic filled completely the cylindrical barrel, but the plastic was not at a uniform temperature. The reciprocating screw overcomes this in three ways.
First, in modern units, the plastic fills only the space around the shaft of the screw. This eliminates the cooler central region leaving a thinner, evenly heated layer of plastic. Second, the screw has “flights” that wrap around the shaft. As the screw rotates, the flights transport the raw material forward through the barrel. The flights also serve to mix the plastic. The screw action agitates the melting pellets within the flights to create a uniform mixture. Third, the screw action itself heats the plastic throughout. The shaft’s diameter increases along the screw so that the distance between the wall and the shaft decreases. The flights, then squeeze out air as they move the plastic forward, shear the pellets and press them against the barrel’s wall. This shearing creates friction and so heats the plastic.
This screw-included shear supplies a majority of the heat needed to melt the plastic – between 60 an 90 percent – with the rest from heater bands. The molten plastic flows past the front of the screw through indentations or “flutes”. When there’s enough plastic to fill the mold at the front of the screw, it rams forward like a plunger injecting the plastic into the mold.
Another way to guarantee all materials will melt well is from the quality of pellets and colorant. Because choosing good-quality materials will help you cut down the time to fix mistakes happening through process. Indeed, filler masterbatch or color masterbatch – such as black masterbatch, white, blue…according to your requests are good choices to try.


